Running FLUX.2 Klein
FLUX.2 Klein is Black Forest Labs' new image generation model, released January 15, 2026. It's designed for interactive, real-time use cases where you need images fast. The 4B distilled variant generates images in just 4 inference steps and fits in around 13GB of VRAM. It supports resolutions from 64x64 up to 4 megapixels (e.g., 2048x2048), with dimensions as multiples of 16.
The 4B models are Apache 2.0 licensed, which means commercial use is straightforward. The 9B models use a non-commercial license.
Beyond text-to-image, Klein supports image editing and multi-reference composition. BFL's API limits Klein to 4 reference images; for local inference with open weights, the practical limit depends on GPU memory. BFL also provides FP8 and NVFP4 quantized checkpoints that reduce VRAM by up to 40% (FP8) and 55% (NVFP4), benchmarked on RTX 5080/5090.
This tutorial covers running FLUX.2 Klein on JarvisLabs.
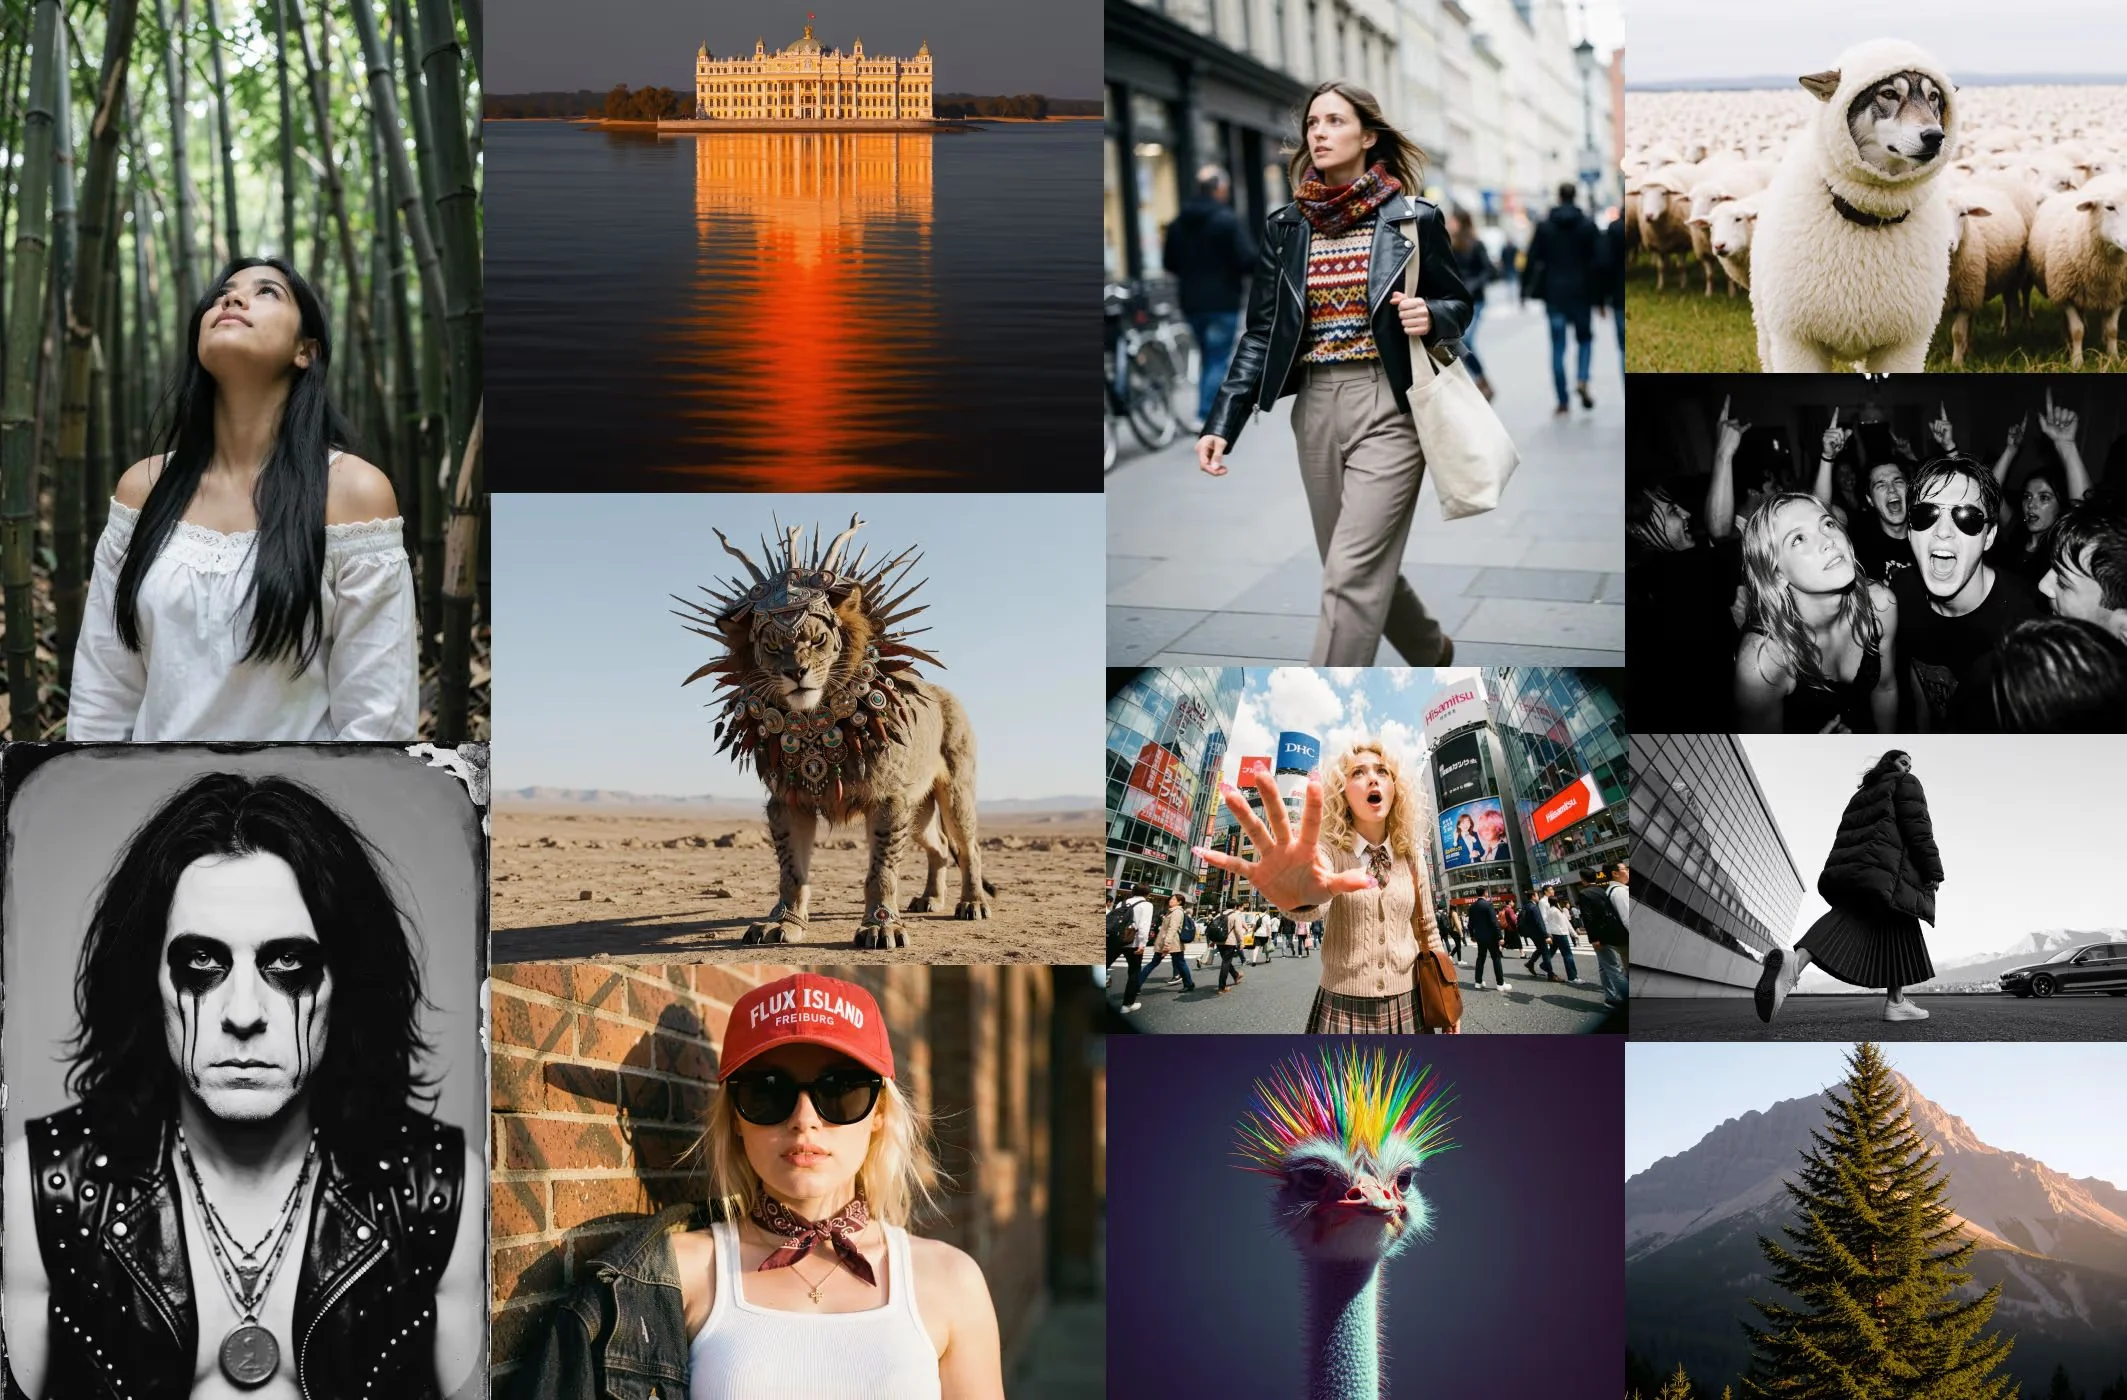 Text-to-image generation with FLUX.2 Klein. Source: Black Forest Labs
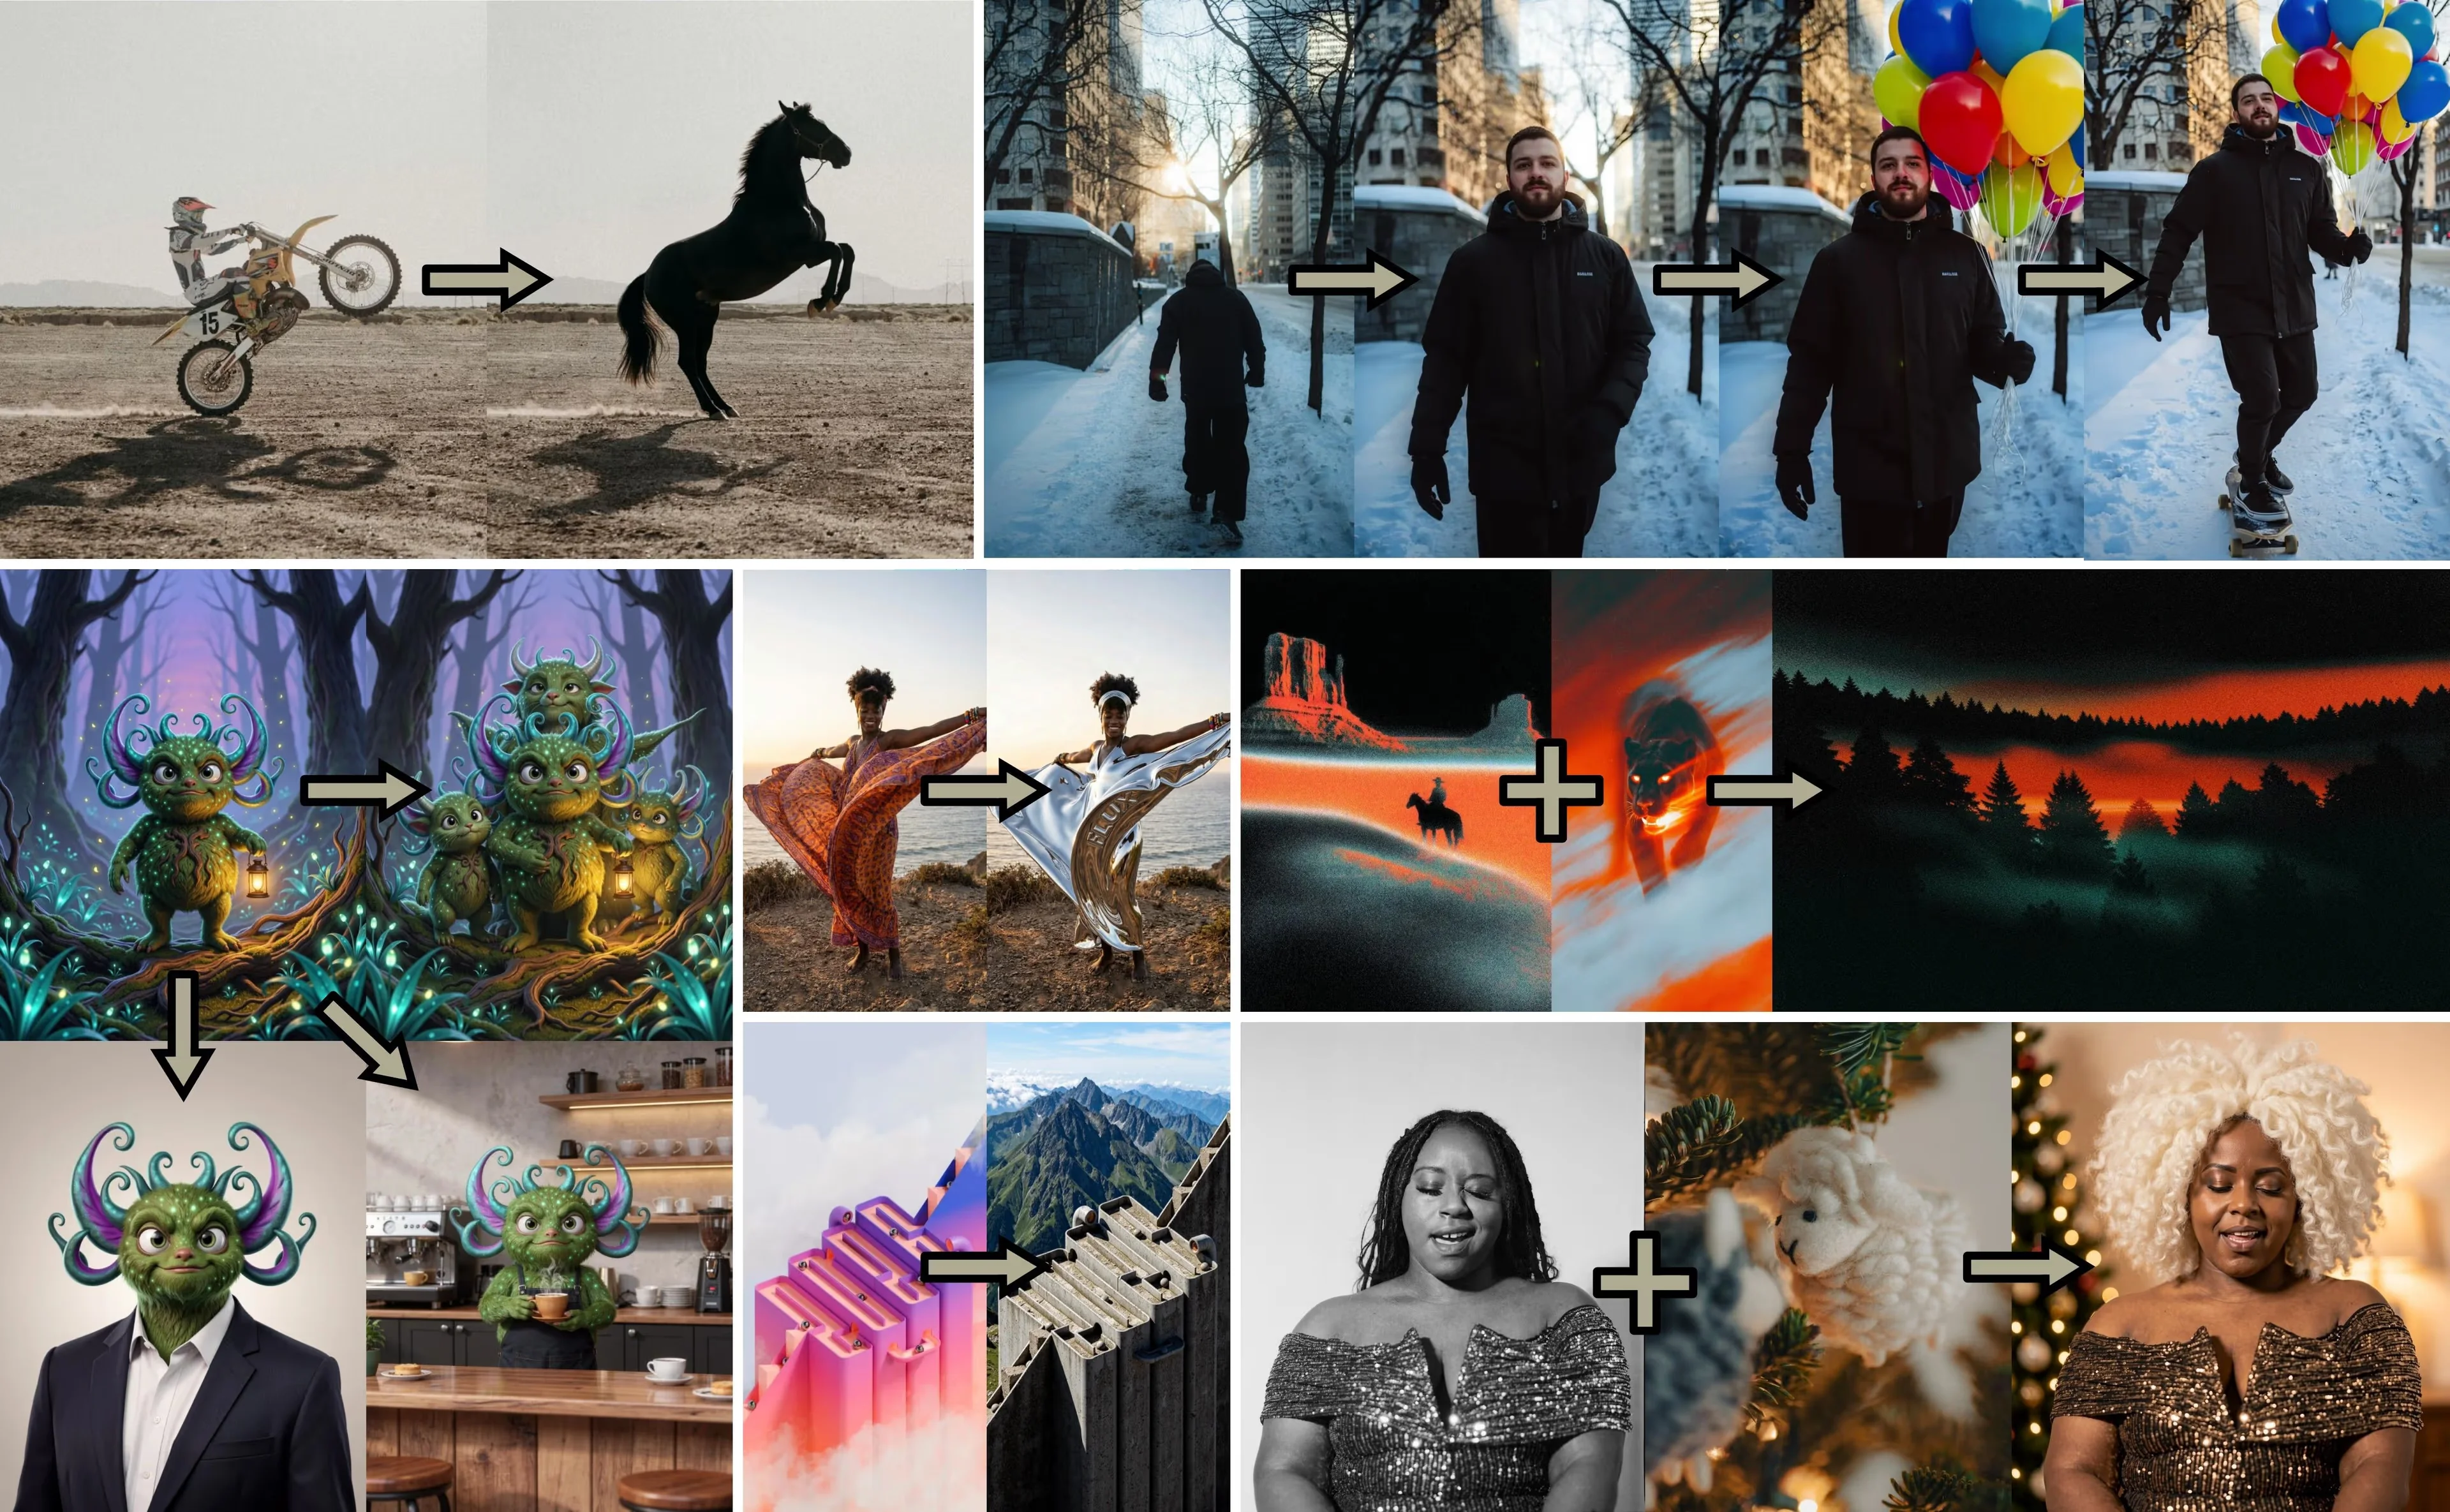 Image editing with FLUX.2 Klein: scene changes, style transfer, and multi-reference composition. Source: Black Forest Labs
Model Variants
FLUX.2 Klein comes in four variants:
| Variant | Parameters | Steps | Guidance | License | VRAM |
|---|---|---|---|---|---|
| Klein 4B (distilled) | 4B | 4 | 1.0 | Apache 2.0 | ~13GB |
| Klein 4B Base | 4B | 50 | 4.0 | Apache 2.0 | ~13GB |
| Klein 9B (distilled) | 9B | 4 | 1.0 | Non-Commercial | ~29GB |
| Klein 9B Base | 9B | 50 | 4.0 | Non-Commercial | ~29GB |
Note: VRAM estimates are from the official HuggingFace model cards.
Distilled vs Base: The distilled models are optimized for speed. They produce good results in just 4 steps. The base models are undistilled and need around 50 steps, but they're meant for fine-tuning. If you want to train a LoRA or adapt the model to your style, use the base variant.
4B vs 9B: The 9B is BFL's flagship Klein variant, but it requires more VRAM and is non-commercial. For most use cases, the 4B distilled model hits the sweet spot between speed, quality, and licensing flexibility.
Unlike some models that auto-enhance short prompts, Klein uses your prompt as-is. Be descriptive.
Setup
- Go to jarvislabs.ai and create a new instance
- Select A5000 (24GB) or A100 (40GB) and the PyTorch template
- Set storage to 100GB
- Launch and connect via JupyterLab or SSH
The A5000 handles the 4B model comfortably. For the 9B model (~29GB VRAM), use an A100 or larger. For maximum speed, use an H100.
Next, install the diffusers library:
uv pip install git+https://github.com/huggingface/diffusers.git transformers accelerate safetensors
The 9B weights are gated. You'll need to:
- Accept the license on the model card
- Set your HuggingFace token:
export HF_TOKEN=your_token_here
The 4B model is open and doesn't require a token.
Quick Start
To quickly get started with running the model, open a Jupyter notebook in your JarvisLabs instance and run:
import torch
from diffusers import Flux2KleinPipeline
pipe = Flux2KleinPipeline.from_pretrained(
"black-forest-labs/FLUX.2-klein-4B",
torch_dtype=torch.bfloat16,
).to("cuda")
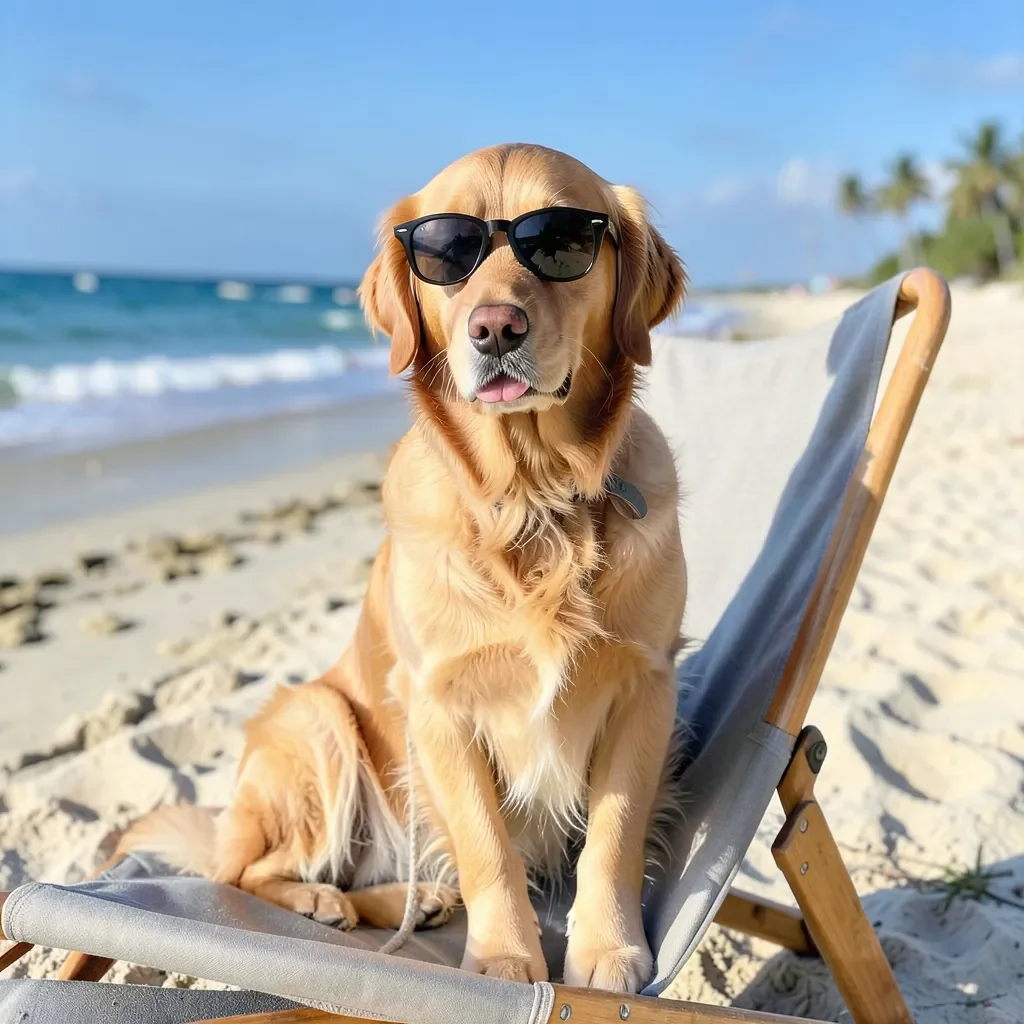
image = pipe(
"A golden retriever wearing sunglasses, sitting on a beach chair",
height=1024,
width=1024,
guidance_scale=1.0,
num_inference_steps=4,
generator=torch.Generator(device="cuda").manual_seed(0),
).images[0]
image.save("output.png")
image
Parameters:
guidance_scale=1.0andnum_inference_steps=4are BFL's reference settings for the distilled model (it was step-distilled to 4 steps).heightandwidthshould be multiples of 16. Max output is 4 megapixels.generatorwith a fixed seed gives reproducible results.
To use the base model instead, change the checkpoint and parameters:
pipe = Flux2KleinPipeline.from_pretrained(
    "black-forest-labs/FLUX.2-klein-base-4B",  # base variant
    torch_dtype=torch.bfloat16,
).to("cuda")

image = pipe(
    "A golden retriever wearing sunglasses, sitting on a beach chair",
    height=1024,
    width=1024,
    guidance_scale=4.0,
    num_inference_steps=50,
    generator=torch.Generator(device="cuda").manual_seed(0),
).images[0]
The base model is not guidance-distilled, so you can tune the guidance_scale and num_inference_steps parameters. It's slower but gives you more control, and it's the right starting point if you plan to fine-tune with LoRA.
Pre-built Scripts
You can find the benchmarks and pre-built scripts in our flux2-klein GitHub repo.
We provide two ready-to-use scripts for running FLUX.2 Klein:
- Gradio App: A web UI for interactive image generation. Good for experimenting with prompts and settings.
- FastAPI Server: An API server for integrating with other applications. Useful for building pipelines or connecting from external services.
Both scripts support the 4B and 9B models via the --model flag. They run on port 6006, which JarvisLabs exposes as a public endpoint.
The scripts use inline script metadata (PEP 723), so uv run automatically installs all dependencies on first run - no manual setup needed.
Optimizations
Both scripts include optimizations for lower latency, based on techniques from the Diffusers optimization guide:
- torch.compile: Compiles the transformer and VAE decoder into optimized CUDA kernels using
max-autotunemode with static shapes. - Fused QKV projections: Combines query, key, and value projections into a single operation.
- Channels-last memory format: Rearranges VAE tensors for better GPU memory access patterns.
- Native flash attention: Uses the native flash attention backend for faster attention computation.
Benchmarks on an A100 (1024x1024, 4 steps):
| Model | Config | Time | Speedup |
|---|---|---|---|
| 4B | Baseline (bf16) | 1.22s | 1.0x |
| 4B | All optimizations | 0.90s | 1.36x |
| 9B | Baseline (bf16) | 2.24s | 1.0x |
| 9B | All optimizations | 1.79s | 1.25x |
The first run includes kernel compilation and warmup, which can take 2-3 minutes in our testing. Once the app or server is up, generation is fast.
Gradio App
Clone the repo and run the Gradio app:
git clone https://github.com/Gladiator07/flux2-klein
cd flux2-klein
uv run flux2_gradio_app.py
For the 9B model, add --model 9b:
uv run flux2_gradio_app.py --model 9b
The app runs on port 6006. You can access it in two ways:
From JupyterLab: Open http://localhost:6006 in a new browser tab.
From anywhere: Click the API button on your JarvisLabs instance to get the public URL.

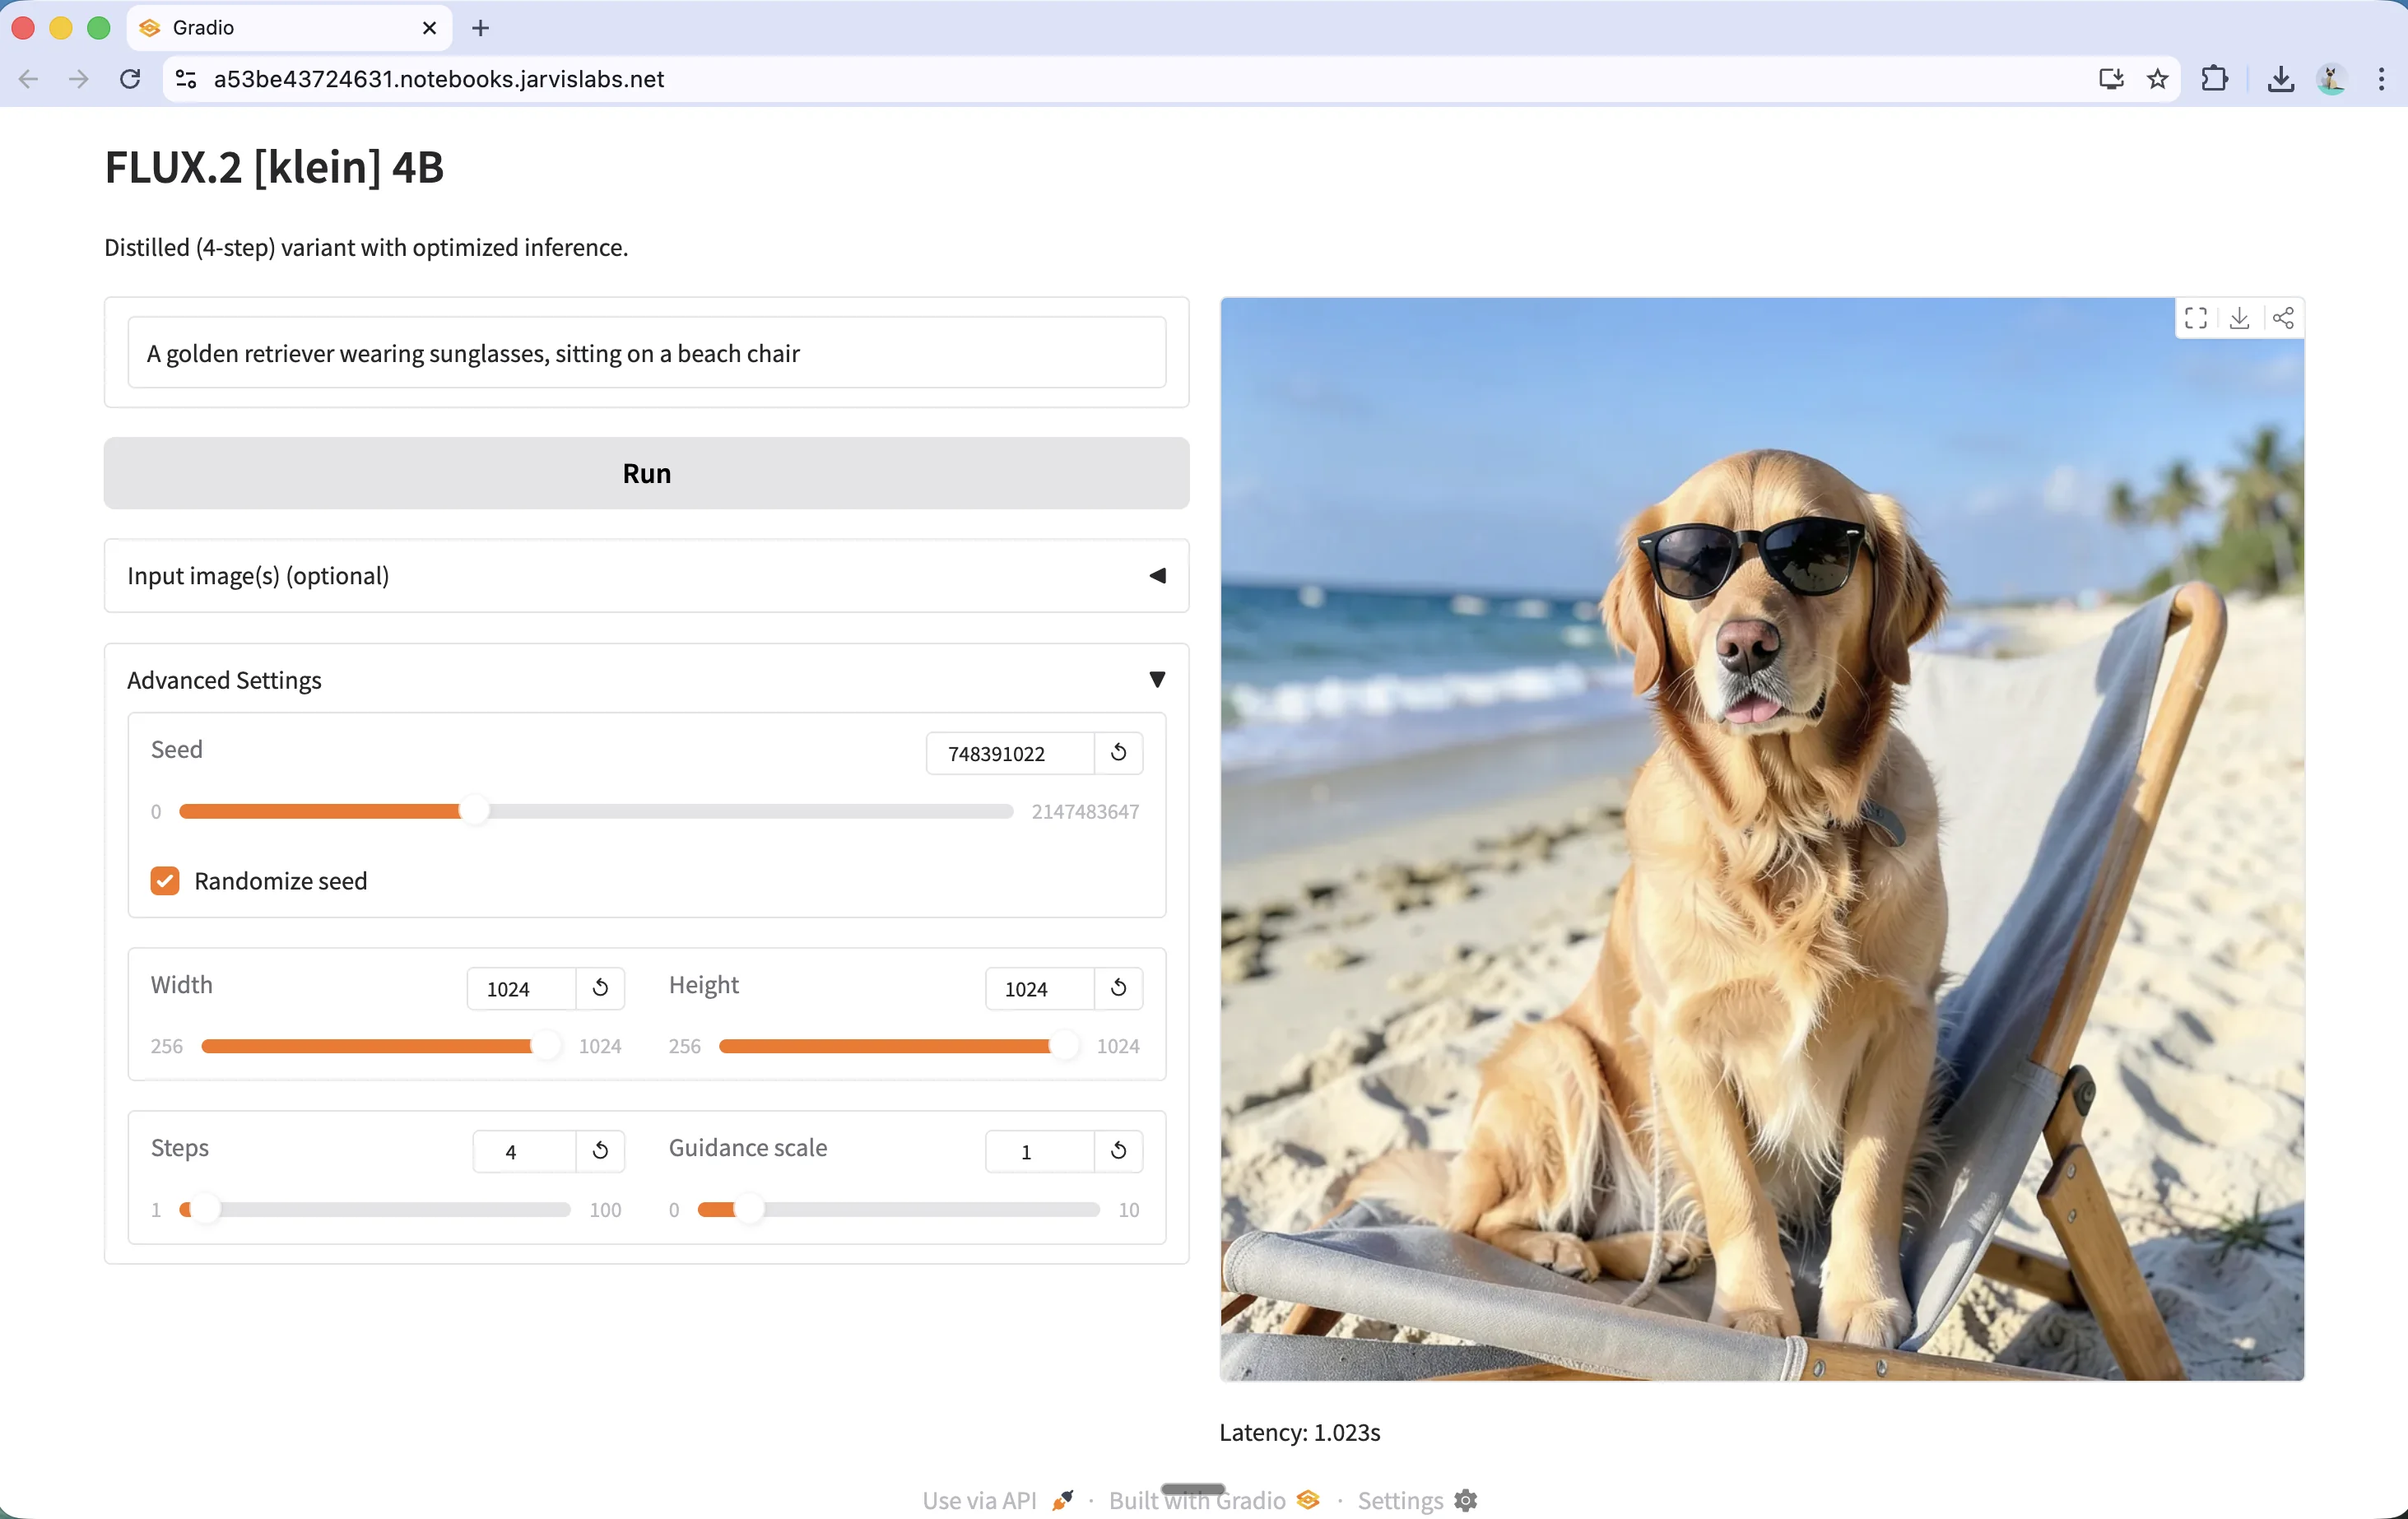
The Gradio app also supports image editing and multi-reference composition. Expand the Input image(s) section to upload reference images, then describe the changes you want in your prompt.
FastAPI Server
For API access, run the FastAPI server:
uv run flux2_fastapi_server.py
For the 9B model:
uv run flux2_fastapi_server.py --model 9b
The server runs on port 6006. Test it locally from the JupyterLab terminal:
curl -X POST http://localhost:6006/generate \
  -H "Content-Type: application/json" \
  -d '{"prompt": "A stack of old leather-bound books with reading glasses, warm library lighting"}' \
  --output books.png
To access the API externally, get your public URL from the JarvisLabs dashboard by clicking the API button on your instance:
Then use the public URL in your requests:
curl -X POST https://<your-instance-url>/generate \
  -H "Content-Type: application/json" \
  -d '{"prompt": "A stack of old leather-bound books with reading glasses, warm library lighting"}' \
  --output books.png

Next Steps
You can start experimenting with this on JarvisLabs. We have A5000, A6000, A100, H100, and H200 GPUs available. Check the pricing page for current rates.
For fine-tuning the base model with LoRA, see our Finetune Flux with LoRA tutorial.